patterns >  Bilby & Ben's Ravelry Store and 1 more...
> Verona Picnic Blanket & Play Mat


Verona Picnic Blanket & Play Mat
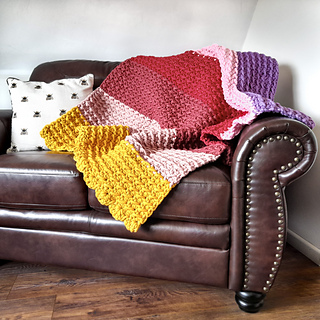
I was inspired by my time in Verona to capture some of those beautiful sunset tones above the city in this stunning mix of warm yellows, soft pinks and fiery reds.
My husband and I love spending summer evenings outdoors, watching the sky changing colour, but it can often be quite uncomfortable on the hard and bumpy ground with just a thin sheet underneath. So I really wanted to find a way to make those special moments more relaxing, and super chunky tube yarn seemed like the perfect thing!
The result is just wonderful: it’s so thick and squishy you feel like you’re walking and sitting on a big pile of marshmallows. It also makes for a great play mat for your little ones because of how padded and soft it is.
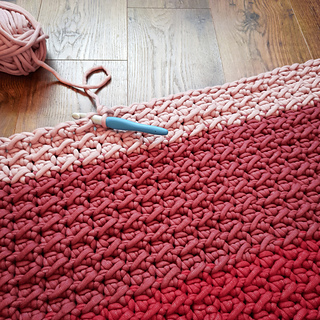
I chose Hobbii Bungee Mini for my project, a filled tube yarn that’s ideal for showing off stitch texture and really making things pop! The blanket is made using even moss stitch – a combination of two basic stitches – so it’s a very beginner-friendly pattern.
Using the correct gauge, your finished piece will measure approximately 120cm (47”) x 140cm (55”).
You’ll use equal amounts of each of your 6 colour blocks, and will need 3 x 200g / 60m (65yds) balls of each colour.
I’ve included the colours of yarn I used and the order I used them in both here and in the pattern below, but you can of course choose any variety or sunset colours you like (or indeed any combination colours in general).
I used Hobbii Bungee Mini in the following shades and quantities:
3 x Light Purple / Orchid (15)
3 x Light Pink (14)
3 x Red (17)
3 x Soft Red / Marsala (13)
3 x Pale Orange / Rose (05)
3 x Warm Yellow / Curry (11)
Because this is such chunky yarn, I recommend using your fingers or a smaller crochet hook rather than a needle to weave in loose ends. Just make a small knot at the end of each one before doing so to ‘close’ the tube yarn first.
You’ll be working in rows, where the turning chain does not add to the st count. You may find it helpful to place a st marker at the start and end of each working row as you go to make it easier to find your first and last slst.
Happy crocheting!
102 projects
stashed
205 times
- First published: August 2024
- Page created: August 10, 2024
- Last updated: February 6, 2025 …
- visits in the last 24 hours
- visitors right now


